
Table of Contents
This series is designed to help people to understand modern technology, and become more confident in using computing devices. It is not designed to educate experts.
The author is involved in tutoring older students at SeniorNet, a New Zealand wide organisation. SeniorNet hopes that students will feel more confident in using their computing devices as a result of the learning opportunities offered. This series of articles shares that hope.
This article started off life titled “Tech Talk: Adding Speech Bubbles with GIMP”. However, in common with a number of my efforts I wasn’t happy with the result, so rethought it. It’s now titled as you see above.
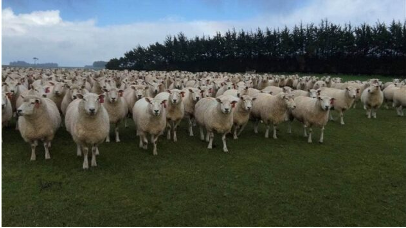
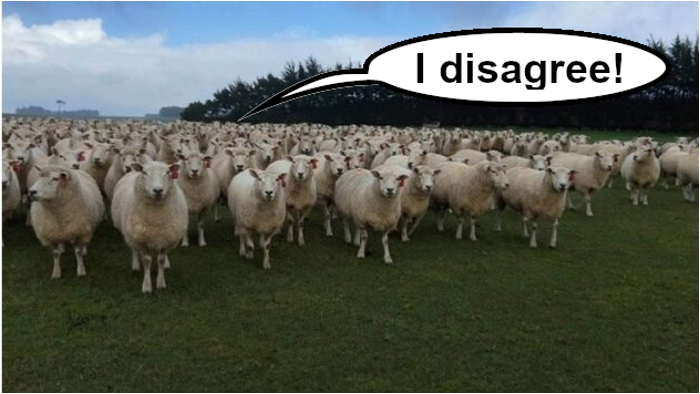
I had wanted to encourage readers to add speech bubbles to their photos. This idea had originally been seeded in me by the BFD Caption Competition where I was invited to add a caption to this photo.
I sometimes have the desire to add speech bubbles to pictures, and the tool I use is GIMP. This is an open source image editor that, while not quite as extensive as Adobe Photoshop, has a huge price advantage because it’s free! No up front cost. No monthly or annual subscription. FREE!
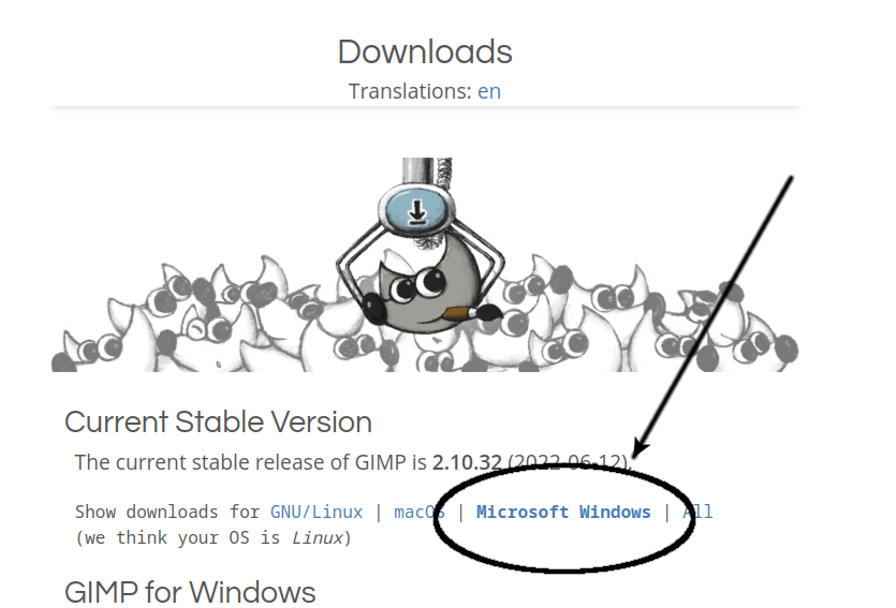
You can download GIMP for Microsoft Windows or Mac OS from here, While you can also download GIMP for Linux from here, I prefer using the package manager for the Linux distro I’m using (Pamac for Manjaro Linux, in my case).
PS. Any graphics editing for this article has been done using GIMP.
Just install as for any package on your computer and you are good to go. You now have a very powerful graphics editor, and without the monthly ransom demanded by Adobe for their editor. There is no advertising built in, and no data grab either. GIMP being an open source programme, you have the assurance that if there was anything nasty hidden in the code, someone would find it and complain, loudly.
First up, we need a photo to edit. Many are available on the internet, but think about copyright issues. Here is a site that explains the detail of the various licences, and gives a list of sites that may enable you to find free images you would actually use for your marketing. And, on the internet does not equal copyright free! Google also provides filters to provide some help in this area. And of course, if you took the photo, you own the copyright for that image.
One of the many bright lawyers who inhabit The BFD may care to write a guide for our members, including the concept of ‘fair use’. And remember, most of the information on the internet relates to the USA. Each country has its own rules.
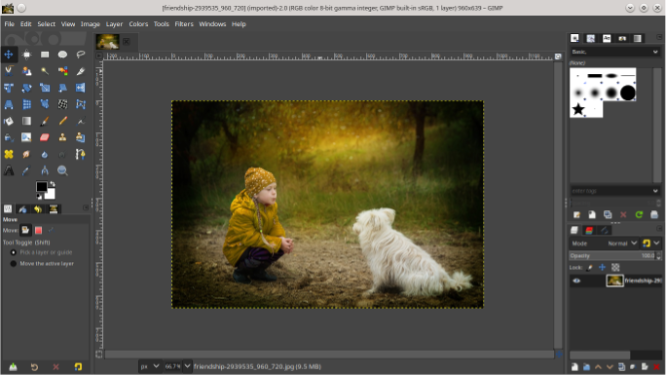
It’s a .jpg image, 960 x 639 pixels. I’ve checked the EXIF metadata and can find no copyright details embedded. It comes from Pixabay, which is a good source of copyright free images.
Here we are, with the image loaded into GIMP.
Now, I’m about to reveal my super secret trick that I use with GIMP, and much other software.
I search YouTube for a video offering me step-by-step instructions. And here is just such a video. The version of GIMP used in the video is older, but the instructions are still relevant.
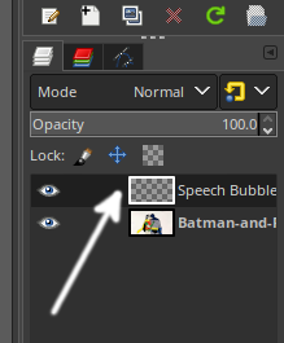
Important: When adding a layer, make sure that the layer you want to edit has been selected.
Click the required layer in the layer stack to select it. This will ensure our editing occurs in the correct layer. This action is the single most overlooked action in GIMP, and probably other image editors that use layers.
You will be able to follow on step by step. Use the computer space bar to start and stop the video.
One thing not covered by the instruction: if you want two (or more) speech bubbles then use a separate layer for each bubble. This makes editing each bubble easier.
When you’ve finished, save your masterpiece to your computer using the save option in the top File menu. This will save in the .xcf format which will enable you to use GIMP for later editing. This format is not suitable for publishing to the web, or including in a word processor document.
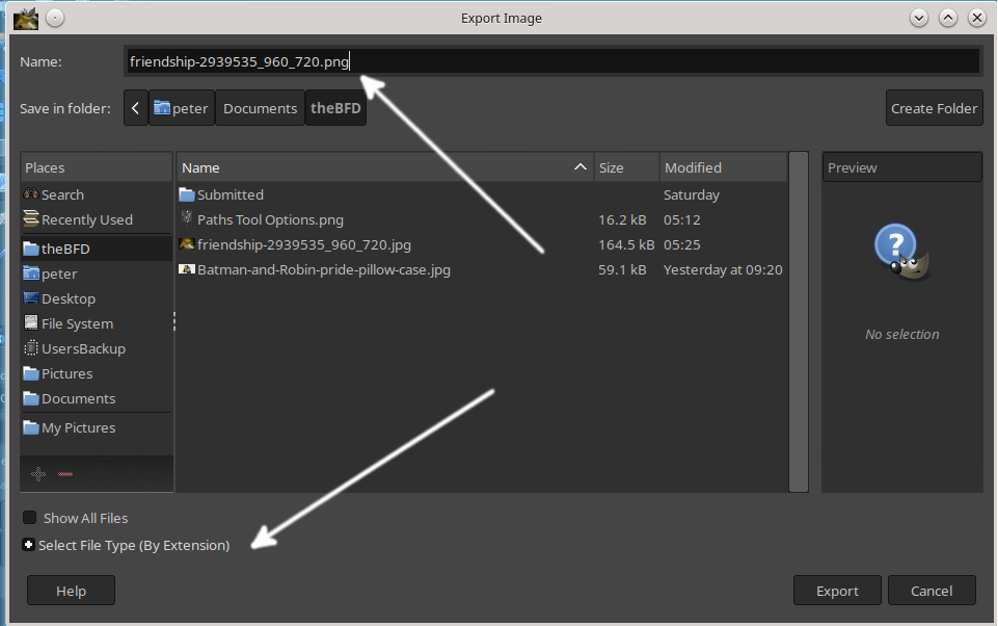
To save in a web or word processor usable format I use the Export As option in the top File menu. In the following example, I have changed the file type to .png (portable network graphics). I use this in preference to the .jpg format. The PNG file format is widely used on websites to display high-quality digital images. Created to exceed the performance of GIF files, PNGs offer not just lossless compression, but also a much broader and brighter colour palette.
I change the file format (if necessary). Note I have amended the bottom choice as well.
Using this technique will enable you to add speech bubbles to photos. And add humour and wit to sites such as The BFD.
Hint: You can use GIMP to strip out exif metadata from images. When you are in the Export area, as described above:
- Go to File > Export As to export the image. …
- Click the Export button.
- For export options, expand the Advanced Options panel and uncheck Save EXIF data.
- Change the other options to your liking, then click Export to finish.
Please note, a number of GIMP tutorials are available on YouTube. Some are better than others. The one I have chosen gives good detail, despite the presenter having an accent, and the GIMP version being outdated.
My secret is using tutorials (mostly from YouTube) together with my free open source tools, and practice. The late Samuel Goldwyn, original name Schmuel Gelbfisz, of Metro Goldwyn Mayer movie fame, once said, “The harder I work, the luckier I get.” Good advice, often disregarded in these “instant” results days.

Enjoy this to give your photos that extra something. And use this resource to learn so many things


