Table of Contents
This series is designed to help people to understand modern technology, and become more confident in using computing devices. It is not designed to educate experts.
The author is involved in tutoring older students at SeniorNet, a New Zealand wide organisation. SeniorNet hopes that students will feel more confident in using their computing devices as a result of the learning opportunities offered. This series of articles shares that hope.
As you no doubt know The BFD has a regular column called the BFD Caption Competition. In this, you are supplied with a picture, usually political, and are invited to add amusing or insightful speech bubbles, or captions. Today I’m going to show you how to add speech bubbles, using my favourite free open source graphics tool, GIMP. This is similar to the well known programme, Photoshop, but with a huge price advantage over the proprietary offering.
I have used GIMP for years, as it’s a mainstay of the open source Linux community. The great thing about this tool, apart from its ZERO cost, is that it’s available to Microsoft Windows and Apple Mac users, as well as the Linux crowd.
Get GIMP for Windows or MAC here. Linux users should download the programme from their distro’s repository.
Security Alert! Don’t download this programme from non official sources as it has been used in the past as a carrier of malware.
Once you have the programme installed, let’s get started. We need a photo to add our speech bubble to, and this one from The BFD from early February will work well.
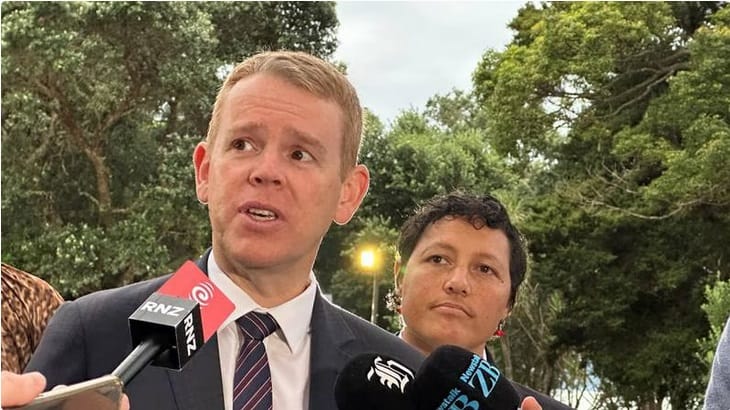
Go to the page link above and download the image to your computer.
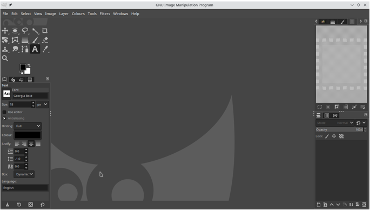
Open GIMP for the first time and you will be presented with a screen that looks like this.
This is the stock screen, and I don’t like it very much. Luckily GIMP is highly (and easily) configurable, so let’s take a few moments to do this.
I want to use a different look to the tool icons, and also I’m not a fan of dark themes, so would like to change this.
To change the tool icons click on Edit/Preferences and then Icon Theme in the Interface area. In the dialogue box that opens choose the set you want, then click OK. Done. I’m a fan of the legacy set, but each to their own.
Choose the Theme that best suits you in by clicking Edit/Preferences and then Theme in the Interface area. I prefer the light theme. By choosing the system theme GIMP will be similar to other programmes on the computer. Fans of dark themes are also catered for.
If you manage to mess up GIMP you can easily revert it to factory setting. Edit/Preferences and click the Reset button at bottom right. Then confirm with the confirmation screen.
PS. You have delved more into the inner workings of this programme than most users. Pat yourself on the back.
PPS. More information on these settings here,
PPPS. Here are some more GIMP tutorials from the same person. I get most of my knowledge from Youtube videos.
To open the photo for editing click File/Open. Navigate to the photo, select it and click Open. This will open the photo ready for editing. But editing the photo itself is not a good idea as a mistake could ruin the original. We use the concept of layers to overcome this.
Layers Concept: This is used by GIMP and many other graphics editing programmes. The easiest way to describe this is to imagine we place a piece of clear plastic over the photo and apply our changes to this. We can use multiple layers, and can gather several layers into a group.
From now on I’m going to just describe the steps to achieve our desired effect. This is what I want to end up with.
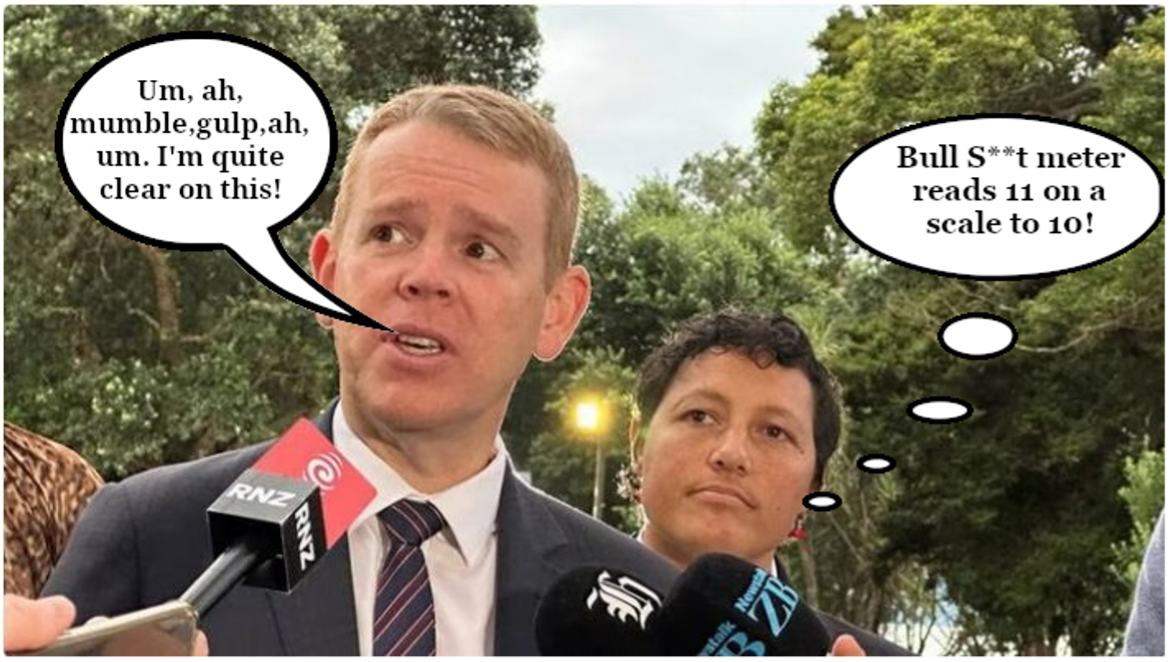
What we have is two bubbles, one a speech and the other a thought bubble. I will go through the speech in this article, then the changes to the technique for the thought bubble in a second smaller article.
Let’s go.
1. On top menu click Layers/New Layer. Give it a name and choose Fill With Transparency. Click OK and note the transparent layer has been added to the layer stack on the right side of the screen. Or you can use the shortcut icons at the bottom of the layer stack (white with black plus).
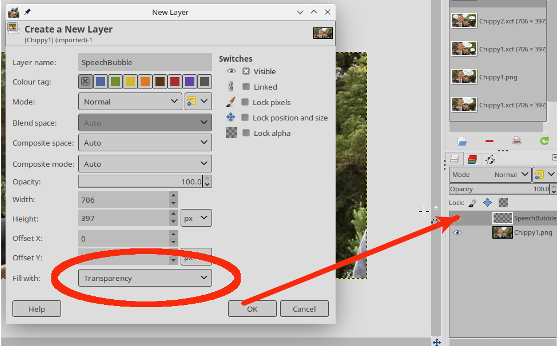
2. Check the new layer is the active or focussed layer with its darker grey background. This should happen automatically at creation, but if it doesn’t, then click the layer name in the layer stack to focus it.
3. Choose the ellipse tool from the toolbox at top left of your screen (ellipse is another word for oval) by clicking on it. Make sure Add to Current Selection tab is selected.
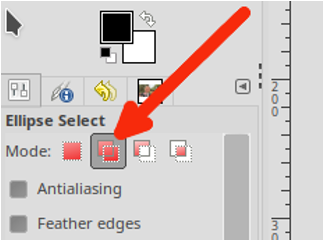
4. Place your cursor where you want the speech bubble, hold down the left mouse button and draw an oval. When you release the mouse button drawing is complete. You can reposition the ellipse by placing your cursor within the ellipse, holding down the left mouse button and moving the mouse. Release the mouse button to complete the move. You can resize the ellipse by placing your cursor in one of the corner boxes, holding down the left mouse button and moving the cursor. It’s all simple, and a few moments practice will make you competent. If you wish to delete the ellipse and start again, in the top menu click Select/None.

5. When your artistic bent is satisfied, select the Path tool in Toolbox.
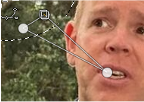
6. Click within the bubble, a second time on or by the mouth, and a third time back in the bubble to make a triangle for the speech bubble. Finally, hover your cursor over the first click point and ctrl/left click to complete the triangle. You should end up with a result like this.
7. Tool Options below the tool box will now show Paths. Click Edit.
8. On each long side of the triangle you’ve just created click mid way, hold the mouse button and drag to create a curve in the line. This is an artistic flourish to make them look nicer. If you don’t like the effect, clicking ctrl/z will undo the last action.
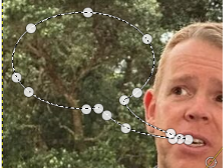
9. Press and hold the shift key and click Selection from Path button which is below Edit that you clicked in 7. above.
10. Click Select in the top menu, and select To Path (the last item on the pop out menu that appears). After a few moments a number of dots will appear around the speech bubble. It should look like this.

11. We are now going to use the colour picker tool. This tool sets the foreground and background colours, and you will often use this with GIMP. It’s the tool that looks like this. The foreground colour in this example is black, and the background colour is white. Clicking the two headed arrow swaps these around. Clicking on the large black or white squares opens the color picker tool, and give you access to thousands of colours.
We want to fill our bubble with white. Click on the two headed arrow to make white the foreground colour, click on the fill bucket tool (unsurprisingly it looks like a bucket) and click in the speech bubble. It will magically fill with white. Another shortcut way to do this is to drag from the white square of the colour picker tool and drop it in the bubble. Being lazy, this is what I do because it cuts out a few clicks. A third way to do this is use Edit (top menu) and fill with FG or BG colour (whichever is white). If you mess up, remember ctrl/z to undo!
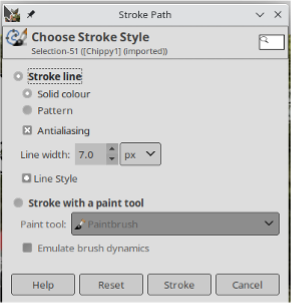
12. Click Edit (top menu) and stroke path. This will put a border around our speech bubble, and will use the foreground colour from the colour picker. So make sure black is selected as the foreground colour (reread 11 above if you are in doubt). Change the dialogue box if needed and click Stroke to apply the border. If it doesn’t suit your artistic flair, undo and change the items, then click Stroke again.
13. Go to Select (Top menu) and click None. Then click on a random tool in the tool box to remove the selection marks (I habitually use the eraser, but any tool will do).
You’ve now completed the speech bubble. Now lets put some text in it. We will use another layer to make it easier to edit our errors, or change the text if we think up something better later on.
14. Make a new layer and name it Speech Text (See instruction No 1 above). This will keep our text separate from the other elements.
15. Select the Text Tool in the Tool Box (it’s the icon with a Capital A). Use the Tool Options to set the font, size and justification. These can also be edited later. Draw a text box where you want the text to appear. The text box can be repositioned and resized as for other input (see instruction 4).
16. Type in your text. Once entered you can edit text by placing the entry point, deleting and re-entering as desired. You can edit the entire text entry by selecting it by using ctrl/a, then using the on screen and font options. Deselect text by clicking it again.
17. Save your completed image (File/Save as). This is a standard file save similar to other programmes. By saving here you can open it later and edit it as required. This will save with a .xcf file extension, with all the layer information intact.
18. Click Image in the top menu, then Flatten Image. This will prepare the image in a format suitable for inclusion on the web or in a text document.
19. Save the image with File/Export As. Use a .png file extension. PNG is short for Portable Network Graphic, a type of raster image file. It’s a particularly popular file type with web designers because it can handle graphics with transparent or semi-transparent backgrounds.
You can now use the image and upload it to thebfd.co.nz.
Congratulations! You have mastered the art of adding a speech bubble to a photo.
The next article will show you how to add a thought bubble.


